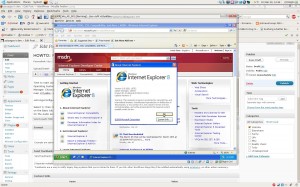
HOWTO: Running IE6, IE7 and IE8 On Ubuntu Intrepid (8.10) Using VirtualBox
Intro
Being able to check how stuff behaves in various versions of Internet Explorer is unavoidable. Switching to Ubuntu recently made me painfully aware of that fact (again).
This (somewhat illustrated) HOWTO details what one must do in order to be able to easily test their stuff in various versions of Internet Explorer on Windows XP SP3 (without having to reboot, switch computers or paying someone else to do it) while still happily having only Ubuntu installed on their machine.
We’ll be using Sun’s VirtualBox software and Microsoft’s Internet Explorer Application Compatibility VPC Images so lets get on with it.
Downloading and installing VirtualBox
If you don’t like the closed-source idea, compare the differences and try with the OSE version. Let me know how it goes.
Update: Phil’s results aren’t pretty. If you’re also seeing BSODs, you might want to try some workarounds.
If you’re comfortable with installing closed-source (binary) packages continue by adding Sun’s public key:
wget -q http://download.virtualbox.org/virtualbox/debian/sun_vbox.asc -O- | sudo apt-key add - |
And adding the following line to /etc/apt/sources.list:
deb http://download.virtualbox.org/virtualbox/debian intrepid non-free |
Install VirtualBox, accepting prompts (to create the vboxusers group and compile the kernel module):
sudo apt-get update && sudo apt-get install virtualbox-2.1 |
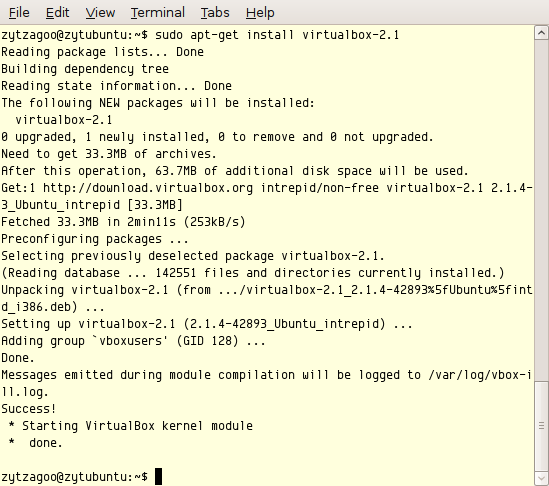
Now add your user to the newly created vboxusers group:
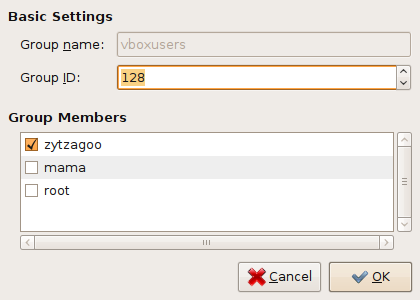
GUI way: System > Administration > Users And Groups > Unlock (type in your password) > Manage Groups > vboxusers > Properties. Check the checkbox next to your username. Close all (not by cancelling though).
CLI way:
groups <username> # you will get a list of groups for that username useradd <username> -g <first group in list> -G <second group>,<third group>,...,vboxusers |
Reboot, or logout and log back in (might work). Reboot is the safe bet.
Downloading and extracting Microsoft’s Virtual Hard Disk images (VHD)
Current VHD images can be found here: http://www.microsoft.com/downloads/details.aspx?FamilyID=21eabb90-958f-4b64-b5f1-73d0a413c8ef&displaylang=en – the URLs will probably change (expire), but these VHDs should work until April 2009. I’m installing WindowsXP SP3 images, although Vista images are also available (check the previous link and explanations there for Vista).
- IE8-XPSP3.EXE (Internet Explorer 8 WindowsXP SP3 VHD)
- IE7-XPSP3.exe (Internet Explorer 7 WindowsXP SP3 VHD)
- IE6-XPSP3.exe (Internet Explorer 6 WindowsXP SP3 VHD)
(yes, the last two have lower-cased extensions, who knows why)
Create a folder to store the VHDs and download the one you need:
mkdir -p ~/VMs && cd ~/VMs wget -bqc http://download.microsoft.com/download/B/7/2/B72085AE-0F04-4C6F-9182-BF1EE90F5273/IE8-XPSP3.EXE |
Once they’re downloaded, extract them using unrar:
unrar e IE8-XPSP3.EXE XP_SP3_IE8/ |

You can delete the .exe files after extraction, they’re not needed any more.
Creating the Virtual Machine
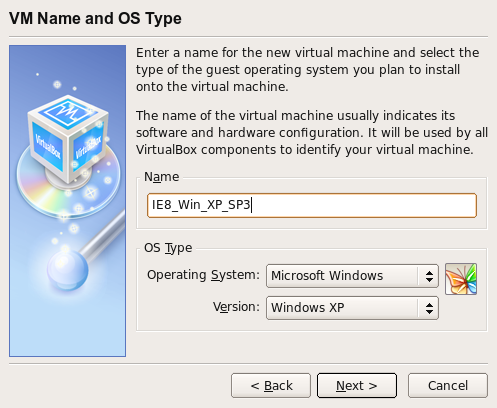
Time to start VirtualBox (Applications > System Tools > Sun xVM VirtualBox). Create a new virtual machine by, you guessed it, choosing New. Name it and set the Operating System to Windows XP.
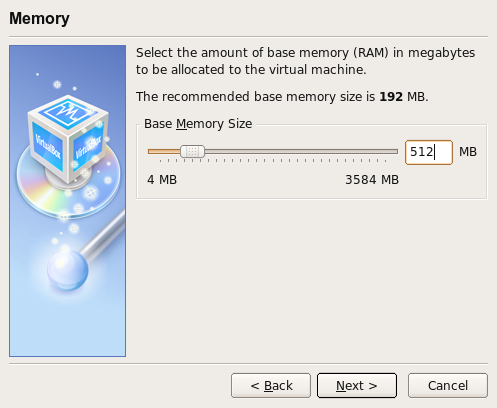
Assign some RAM (keep it under half of your physical RAM).
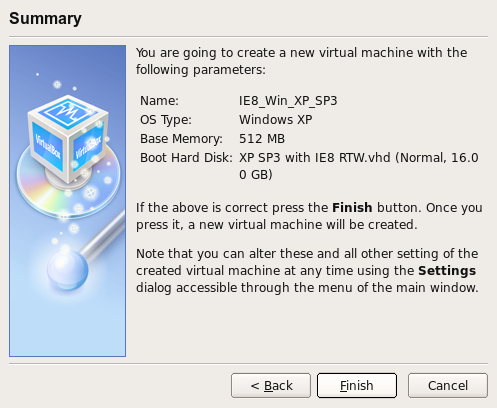
At the Virtual Hard Disk screen choose Existing to open the Virtual Media Manager. Choose Add and select the VHD file you extracted earlier. Choose Select to close the Virtual Media Manager.
Choose Next, then Finish and you’ll return to the main VirtualBox window which should now list your new Virtual Machine.
Configuring the new Virtual Machine
Optional: select it, then choose Settings (available on right-click as well). General should be preselected on the left, increase the Video Memory Size and enable 3D acceleration on the Basic tab. Click OK to close the Settings, and click Start to power up your new virtual machine.
Once it boots, cancel out any dialogs, prompts, windows, etc.
Go to Devices > Install Guest Additions (it’s in the window’s menu bar). Follow the prompts accepting defaults and you’ll have installed VirtualBox additions. When prompted, reboot the machine. If it doesn’t prompt you, go to Machine > Reboot (menu bar again).
Once it reboots, click OK on the mouse pointer dialog thingy (you will not have to manually capture the mouse again, nice!).
Now go to Start > Run and paste the following in there:
D:\VBoxWindowsAdditions-x86.exe /extract /D=C:\Drivers |
The above extracts some default drivers into the virtual machine’s c:\Drivers folder which we’ll need to set up the Ethernet adapter.
Now go to Start > Administrative Tools > Computer Management and select the Device Manager there. Navigate to Network Adapters, Ethernet Controller. Right click it and choose “Update Driver…“. Select “Yes, now and every…” and click Next. Select “Install from a list or specific location“, click Next. In the Location box paste in “C:\Drivers\x86\Network\AMD” or navigate to it manually. Click Finish.
You should have a working ethernet connection now. Fire up IE 8 and test it out!
If all went well, we’re done here!
Parting thoughts
When closing the VM choose “Save the machine state” if you wish to avoid waiting for all those boot screens the next time you start the VM.
Virtualization rules.
